Conventional NDT Services
At ESCON, we have more than three decades of experience in offering Conventional NDT services catering to the stringent requirements of the Oil & Gas, Energy,
Petrochemical and Heavy Engineering Industries all over Asia. We have helped in ensuring project completion in a timely
and reliable manner without any back-log of inspection activities for all our clients.


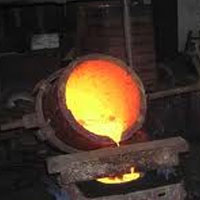
RADIOGRAPHY TESTING
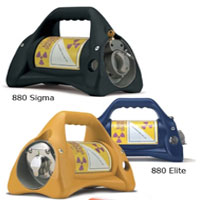
Radiography has a wide scope of use. In general, all types of material can be irradiated by means of radiography. Depending on the type and the thickness of the material, an optimal selection will be made for the inspection equipment to be used. Steel up to 50 mm can be thoroughly irradiated using the standard X-ray equipment. Using suitable radioactive sources like Selenium, Iridium 192 , Cobalt 60 (gamma radiation) even steel thickness of up to 200 mm can be inspected. The internal soundness of weldments, castings, shop fabrications, and plant piping systems can be evaluated by gamma radiography. Slag inclusions, shrinkage, lack of penetration, and porosity are among the defects that can be detected.
ULTRASONIC TESTING
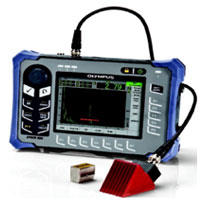
Ultrasonic testing is carried out using an ultrasonic flaw detector and an ultrasonic probe. In the inspection, ultrasound is sent into the area of interest. The ultrasound can be reflected from an interface (ex.Discontinuity) and received by the probe. The reflected ultrasound is displayed on a cathode ray tube screen in the flaw detector and the signal can be analyzed. This method of inspection is normally carried out on butt welds and is usually limited to section thickness of 8mm and above. It is technically difficult to perform the inspection on thin materials using conventional ultrasonic equipment. This method is good for detecting internal discontinuities. Surface or near surface discontinuities may not be easily detected.
MAGNETIC PARTICLE TESTING
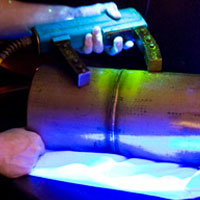
Magnetic Particle Testing is an inspection method with which defects on or close to the surface (to a depth of approx. 2 mm) in a ferro-magnetic material can be traced. It uses the principle that a crack or other discontinuity on the surface causes a magnetic stray field in a magnetized object. A crack will be made visible by an interruption of this field. The indications that are found are judged by their nature, size and location with the aid of an inspection standard. The shape or dimensions of the object do not or do not generally limit it. As with radiographic and ultrasonic inspection, the method can also be used well in the field or in companies.
DYE PENETRANT TESTING
Dye Penetrant Testing is a technique by which a specially designed colored dye is used in conjunction with specially formulated developers are used to detect surface breaking indications on any ferromagnetic or non-ferromagnetic material to assist in determining the material integrity. Applications include determining weld surface integrity and detection of defects of all types of surface breaking discontinuities resulting from many different reasons. Dye Penetrant testing can be used on practically all materials. However, a condition is that the materials have a solid shape and are non-porous. As a rule this concerns non-magnetizable materials.

POSITIVE MATERIAL IDENTIFICATION
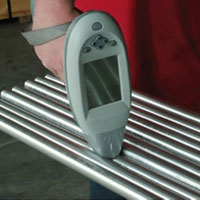
Positive Material Identification Testing helps to identify the composition of various components being used in the fabrication of critical components in a wide range of industries ranging from Electronics to Oil and Gas. Equipment available vary in size and thus portability. At ESCON we have the portable Niton equipment capable of identifying readily over 100 different alloys. All that is necessary for analysis is to expose the sample to the instrument for a few seconds, and then read the final identification from the display or printout. Factory calibration provides a direct readout of alloy name in five seconds or less.